Rainbow Loom Instruction Manual PDF⁚ A Comprehensive Guide
Unleash your creativity with our comprehensive guide! This manual will take you from basic setups to advanced patterns, ensuring you master the art of Rainbow Loom creations. Downloadable and easy-to-follow, start your loom journey today!
Welcome to the colorful and creative world of Rainbow Loom! This innovative craft has captured the hearts of millions, offering endless possibilities for creating bracelets, charms, and more. The Rainbow Loom is more than just a toy; it’s a tool that encourages creativity, develops fine motor skills, and provides hours of engaging fun for both kids and adults.
Invented in 2011 by Cheong Choon, the Rainbow Loom quickly rose to prominence, winning the Toy of the Year award in 2014. Its simple yet versatile design allows users to weave colorful rubber bands into intricate patterns and designs. From basic single-chain bracelets to complex 3D figures, the Rainbow Loom empowers you to bring your imagination to life.
This comprehensive guide will walk you through everything you need to know to get started with your Rainbow Loom. We’ll cover the basics of setting up your loom, mastering fundamental bracelet patterns, and exploring advanced techniques for creating charms and figures. Whether you’re a beginner or an experienced loomer, you’ll find valuable tips and tricks to enhance your skills and expand your creative horizons.
The Rainbow Loom is compatible with various other looms, including Bandaloom, Wonder Loom, Cra-Z-Loom, and FunLoom, making it a versatile addition to any crafter’s toolkit. We’ll also provide resources for finding tutorials and patterns online, as well as tips for storing and organizing your Rainbow Loom supplies. Get ready to embark on a colorful journey of creativity and self-expression with the Rainbow Loom!
So, gather your rubber bands, set up your loom, and let’s dive into the wonderful world of Rainbow Loom crafting. With a little practice and imagination, you’ll be creating stunning bracelets, charms, and figures in no time!
Setting Up Your Rainbow Loom
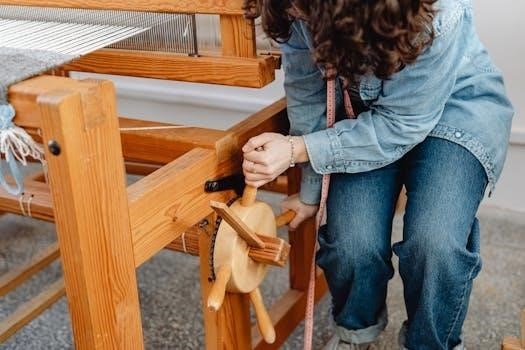
Before you can start creating amazing Rainbow Loom designs, it’s essential to set up your loom correctly. Proper setup ensures that your rubber bands are secure and your patterns are consistent. Follow these simple steps to get your Rainbow Loom ready for action⁚
- Assemble Your Loom⁚ Begin by assembling your Rainbow Loom according to the manufacturer’s instructions. Ensure that all pegs are securely in place. The standard setup involves arranging the pegs in a staggered configuration, which allows for easy weaving of the rubber bands.
- Peg Orientation⁚ Make sure the U-shaped or arrow-shaped pegs are facing upwards. This orientation is crucial for properly hooking and looping the rubber bands as you create your designs. Double-check that all pegs are aligned correctly to avoid any issues during the weaving process.
- Prepare Your Rubber Bands⁚ Sort your rubber bands by color for easy access during crafting. This will save you time and frustration as you work on your projects. Consider using small containers or organizers to keep your rubber bands neatly separated.
- Organize Your Tools⁚ Keep your loom hook, C-clips (or S-clips), and any additional accessories within reach. These tools are essential for manipulating the rubber bands and securing your finished creations. A well-organized workspace will make the crafting process more efficient and enjoyable.
- Loom Configuration⁚ Depending on the pattern you’re following, you may need to adjust the configuration of your loom. Some patterns require a specific peg arrangement or the use of multiple looms. Always refer to the instructions for your chosen pattern to ensure that your loom is set up correctly.
By following these steps, you’ll have your Rainbow Loom set up and ready to go in no time. A properly configured loom is the foundation for creating beautiful and intricate Rainbow Loom designs. Now that your loom is ready, let’s move on to learning some basic bracelet instructions!
Basic Bracelet Instructions
Creating a basic Rainbow Loom bracelet is a fantastic way to start your looming journey. These simple patterns are easy to learn and perfect for beginners. Here are step-by-step instructions for making a single chain bracelet, a fundamental design that will help you grasp the basic techniques⁚
- Prepare Your Loom⁚ Ensure your Rainbow Loom is set up with the pegs in a staggered configuration and the U-shaped pegs facing upwards. This is the standard setup for most basic bracelets.
- First Rubber Band⁚ Place your first rubber band from the first peg to the second peg on one row. Stretch the rubber band so it sits securely on both pegs.
- Continue Placing Rubber Bands⁚ Continue placing rubber bands, each from one peg to the next, down the row. Repeat this process on the other rows, creating a continuous chain of rubber bands.
- Looping Process⁚ Using your loom hook, reach under the first rubber band on the second peg and loop it over the peg. This creates the first link in your bracelet.
- Continue Looping⁚ Continue looping the bottom rubber band over each peg down the row. Repeat this process on all rows of the loom.
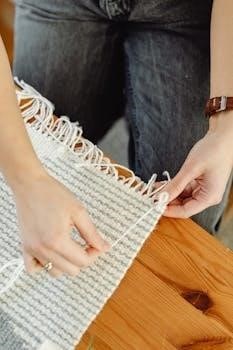
- Finishing the Bracelet⁚ Once you’ve looped all the rubber bands, carefully remove the bracelet from the loom. Use a C-clip or S-clip to connect the two ends of the bracelet, forming a closed loop.
- Variations⁚ Once you’ve mastered the single chain, experiment with different colors and patterns. Try using two rubber bands at a time for a thicker bracelet, or create a pattern by alternating colors.
With these basic instructions, you can create a variety of simple bracelets and gain confidence in your looming abilities. Remember to take your time and practice each step. As you become more comfortable, you can explore more complex patterns and designs. Have fun creating your first Rainbow Loom bracelet!

Advanced Bracelet Patterns
Once you’ve mastered the basic Rainbow Loom bracelet, it’s time to explore more intricate and advanced patterns. These designs require a bit more skill and patience, but the results are well worth the effort. Here are a few popular advanced bracelet patterns to try⁚
- Starburst Bracelet⁚ The Starburst bracelet creates a beautiful, star-like design. Start by placing a center color rubber band on the center peg. Then, create “starbursts” around the center by looping rubber bands from the surrounding pegs to the center peg. Repeat this process with different colors to create a vibrant and eye-catching bracelet.
- Double Rhombus Bracelet⁚ This pattern features a series of interconnected rhombus shapes. It requires careful placement and looping of the rubber bands to create the distinctive geometric design. The Double Rhombus bracelet is a visually stunning pattern that will impress your friends.
- Hexafish Bracelet⁚ The Hexafish bracelet is a complex and intricate design that resembles a fish scale pattern. It involves looping multiple rubber bands at once and requires precise movements to achieve the desired effect. This pattern is a true test of your looming skills.
- Dragon Scale Bracelet⁚ This pattern mimics the texture of dragon scales, creating a unique and visually appealing bracelet. It involves layering rubber bands in a specific sequence to achieve the textured effect. The Dragon Scale bracelet is a great way to showcase your creativity and attention to detail.
- Ladder Bracelet⁚ The Ladder bracelet creates a woven effect that resembles a ladder. It involves looping rubber bands across multiple rows of pegs to create the interconnected design. This pattern is a great way to add depth and dimension to your bracelets.
When attempting these advanced patterns, it’s helpful to watch video tutorials and follow step-by-step instructions carefully. Don’t be discouraged if you make mistakes along the way. Practice makes perfect, and with a little persistence, you’ll be creating stunning Rainbow Loom bracelets in no time. Experiment with different color combinations and variations to create your own unique designs. Happy looming!
Creating Charms and Figures
Beyond bracelets, the Rainbow Loom offers a fantastic avenue for creating adorable charms and figures. These miniature creations can be attached to bracelets, used as keychains, or simply displayed as fun decorations. Here’s a glimpse into the world of Rainbow Loom charms and figures⁚
- Animal Charms⁚ From cute cats and dogs to playful bunnies and teddy bears, the possibilities for animal charms are endless. These charms often involve creating separate components for the head, body, and limbs, which are then connected using rubber bands. Tutorials and patterns are readily available online to guide you through the process.
- Food Charms⁚ Design miniature versions of your favorite foods, such as pizzas, donuts, and ice cream cones. These charms add a touch of whimsy to any bracelet or keychain. You can use different colored rubber bands to represent the various ingredients and toppings.
- Character Charms⁚ Bring your favorite characters to life with Rainbow Loom. Create miniature versions of popular cartoon characters, superheroes, or even emojis. These charms are a great way to personalize your creations and show off your fandom.
- 3D Figures⁚ Take your looming skills to the next level by creating three-dimensional figures. These figures require more advanced techniques and often involve stuffing the creations with cotton or other materials to give them shape. Examples include miniature animals, vehicles, and even human figures.
- Loomigurumi⁚ Similar to amigurumi (crocheted stuffed toys), Loomigurumi involves creating small, stuffed figures using the Rainbow Loom. These figures are typically made by creating individual components and then joining them together to form the complete figure.
When creating charms and figures, it’s important to use a sturdy hook and strong rubber bands to ensure the creations hold their shape. Start with simple patterns and gradually work your way up to more complex designs. Don’t be afraid to experiment with different colors and techniques to create your own unique creations. With a little practice and creativity, you’ll be amazed at what you can create with the Rainbow Loom.
Troubleshooting Common Issues
Even with clear instructions, Rainbow Loom enthusiasts sometimes encounter snags. Here’s a guide to help you resolve common problems and keep your looming experience smooth⁚
- Rubber Bands Breaking⁚ This is often due to overstretching or using old, brittle bands. Always use fresh, high-quality rubber bands. Avoid pulling too hard when looping, and ensure your hook isn’t damaged or too sharp. If a band breaks mid-project, carefully remove the surrounding bands and replace the broken one, securing it as best you can before continuing.
- Stuck Loops⁚ If a loop gets stuck on a peg, don’t force it. Use your hook to gently wiggle the surrounding bands and create some slack. Then, carefully lift the stuck loop over the peg. Lubricating the pegs with a tiny amount of silicone lubricant can also help.
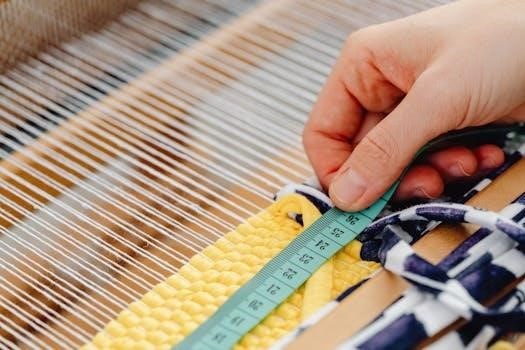
- Uneven Bracelet Length⁚ This can happen if you’re not consistent with your looping tension. Try to maintain a uniform pull on each band as you loop it over. If your bracelet is already uneven, you can try stretching the shorter side or adding a few extra bands to balance it out.
- Difficulty Removing the Bracelet from the Loom⁚ The key is to gently lift each loop off the peg, one at a time, using your hook. Avoid pulling all the loops off at once, as this can cause the bracelet to unravel.
- C-Clips or S-Clips Breaking⁚ Use good quality clips. If one breaks, replace it immediately to prevent the bracelet from coming undone.
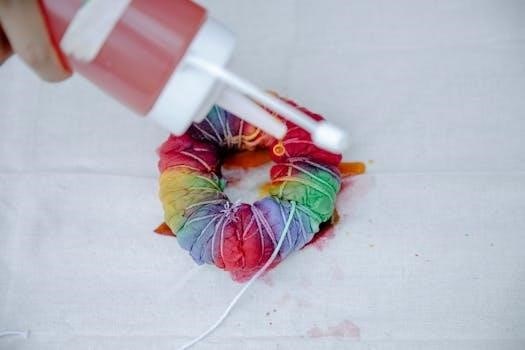
- Color Bleeding⁚ Some darker colored bands bleed onto lighter colored bands, especially when wet. Test your bands beforehand by soaking a few in water to see if they bleed. Avoid mixing bands from different manufacturers, as they may have different dye formulations.
- Pattern Mistakes⁚ If you realize you’ve made a mistake in your pattern, carefully unravel the loops back to the point of the error. Use your hook to lift each loop off the peg, one at a time, and then correct the pattern.
Remember, patience is key! Don’t get discouraged if you encounter problems. With practice and a little troubleshooting, you’ll be able to overcome any challenges and create beautiful Rainbow Loom creations.
Other Looms Compatible with Rainbow Loom Patterns
While the Rainbow Loom is the original and most well-known, many other looms on the market are compatible with Rainbow Loom patterns. This opens up a world of possibilities for crafters who own multiple looms or are looking for alternatives. Here’s a look at some of the most common compatible looms⁚
- Cra-Z-Loom⁚ This loom is very similar in design to the Rainbow Loom and is fully compatible with its patterns. The peg spacing and layout are virtually identical, allowing you to seamlessly transfer instructions between the two.
- Wonder Loom⁚ The Wonder Loom is another popular alternative that works well with Rainbow Loom patterns. It features a slightly different peg configuration, but most patterns can be easily adapted.
- Fun Loom⁚ Similar to the Cra-Z-Loom, the Fun Loom is designed to be directly compatible with Rainbow Loom patterns. Its peg layout and spacing are almost identical, making it a great option for those seeking a readily available alternative.
- Bandaloom⁚ While the Bandaloom has a unique design, it can still be used for many Rainbow Loom patterns. You may need to make slight adjustments to the placement of the rubber bands, but the basic principles remain the same.
- Monster Tail⁚ Although smaller than the standard Rainbow Loom, the Monster Tail is excellent for creating simpler bracelets and charms. Many Rainbow Loom charm patterns can be adapted for use on the Monster Tail.
- Finger Loom⁚ For basic single chain and fishtail bracelets, you can even use a finger loom! These small, portable looms are perfect for on-the-go crafting, and many simple Rainbow Loom patterns can be easily adapted for finger looming.
- Alpha Loom⁚ The Alpha Loom is designed for creating personalized bracelets with letters and patterns. While not directly compatible with all Rainbow Loom patterns, it can be used to add custom elements to your creations.
When using a different loom, it’s always a good idea to test a small section of the pattern first to ensure compatibility. Pay close attention to the peg layout and spacing, and be prepared to make minor adjustments as needed. With a little experimentation, you can adapt almost any Rainbow Loom pattern to work with your favorite loom!
Finding Rainbow Loom Tutorials and Patterns Online
The internet is a treasure trove of Rainbow Loom tutorials and patterns, offering endless inspiration and guidance for crafters of all skill levels. Whether you’re a beginner looking to learn the basics or an experienced loomer seeking new challenges, you’ll find a wealth of resources online.
Here are some of the best places to find Rainbow Loom tutorials and patterns⁚
- YouTube⁚ YouTube is a fantastic resource for visual learners. Numerous channels dedicated to Rainbow Loom crafting offer step-by-step video tutorials for a wide variety of bracelets, charms, and figures. Search for specific patterns or browse channels like “Made by Mommy” or “Rainbow Fun” for inspiration.
- Instructables⁚ Instructables is a community-based platform where users share DIY projects, including Rainbow Loom creations. You’ll find detailed written instructions with accompanying photos for various patterns.
- Pinterest⁚ Pinterest is a visual discovery engine where you can find countless images of Rainbow Loom projects. Use keywords like “Rainbow Loom patterns” or “Rainbow Loom tutorials” to discover new ideas and link to external websites with instructions.
- Etsy⁚ Etsy is a marketplace for handmade and vintage items, and many sellers offer downloadable PDF patterns for Rainbow Loom creations. This is a great option if you prefer a printable format or want to support independent designers.
- Rainbow Loom Official Website⁚ The official Rainbow Loom website often features tutorials and patterns, especially for their newer products and accessories.
- Craft Blogs⁚ Many craft blogs feature Rainbow Loom projects and tutorials. Search for “Rainbow Loom blog” to find blogs dedicated to this craft.
- Facebook Groups⁚ Join Rainbow Loom Facebook groups to connect with other crafters, share your creations, and ask for help with patterns.
When searching for tutorials and patterns online, keep the following tips in mind⁚
- Check the Skill Level⁚ Tutorials often indicate the skill level required (beginner, intermediate, advanced). Choose patterns that match your current abilities.
- Read Reviews⁚ If a tutorial has comments or reviews, read them to see if others have found it helpful and accurate.
- Watch the Entire Video⁚ Before starting a project, watch the entire video tutorial to ensure you understand all the steps.
- Print or Save Instructions⁚ If you find a written pattern you like, print it out or save it to your computer or device for easy access.
- Be Patient⁚ Learning new patterns can take time and practice. Don’t get discouraged if you don’t get it right away.
With so many resources available online, you’ll never run out of Rainbow Loom projects to try! Explore, experiment, and have fun creating your own unique designs.
Be First to Comment