Thank you for purchasing a Nikon D200! This manual is designed to help you enjoy all the features of your D200 camera․ It includes helpful tips, tricks, and preferred settings to guide you in mastering your camera․
Download Locations
Looking for the Nikon D200 instruction manual? You’ve come to the right place! Accessing the manual is easier than ever․ There are several official and trusted sources where you can download the manual in PDF format, ensuring you always have a digital copy at your fingertips․ Here’s a comprehensive guide to finding the download locations⁚
Nikon’s Official Website⁚
- The primary and most reliable source for the Nikon D200 manual is, of course, the official Nikon website․ Navigate to Nikon’s support or download section and search for the D200 model․ You should find the user manual available for direct download․
- Always prefer the official Nikon website to ensure you are downloading a legitimate and up-to-date version of the manual․
Nikon Download Center⁚
- Nikon often maintains a dedicated download center for its various products․ This center is a repository for manuals, software updates, and other resources related to Nikon cameras and accessories․
- Visit the Nikon Download Center, search for the D200, and download the manual․ Ensure you select the correct language version․
Reputable Online Manual Repositories⁚
- Several reputable websites specialize in hosting user manuals for various electronic devices, including cameras․ These sites often archive manuals and offer them for free download․
- Examples of such sites include ManualsLib, UserManuals․tech, and similar platforms․ Always verify the source’s credibility before downloading․
Photography Enthusiast Forums and Groups⁚
- Online forums and groups dedicated to photography, especially those focusing on Nikon cameras, can be a great resource․ Members often share links to manuals and other useful resources․
- Search forums like Nikonians or DPReview for threads related to the D200․ You might find links to the manual or other helpful information․
Third-Party Download Sites (Use with Caution)⁚
- Numerous third-party websites offer manual downloads․ However, exercise caution when using these sites, as some may host outdated or incorrect versions of the manual, or even contain malware․
- Always scan downloaded files with an antivirus program before opening them․
Tips for Downloading⁚
- Check the File Size⁚ Ensure the file size of the manual is reasonable (typically several megabytes)․ An unusually small file size might indicate a corrupted or incomplete download․
- Verify the Language⁚ Download the manual in your preferred language to ensure you can easily understand the instructions and explanations․
- Save the File⁚ Once downloaded, save the manual in a safe and accessible location on your computer or mobile device for future reference․
By following these guidelines, you can easily find and download the Nikon D200 instruction manual from a reliable source, ensuring you have all the information you need to get the most out of your camera․
Manual Contents Overview
The Nikon D200 instruction manual is a comprehensive guide designed to help you fully understand and utilize all the features of your digital SLR camera․ It is structured to provide a clear and progressive learning experience, starting with basic camera setup and operation and advancing to more complex settings and creative techniques․ Here’s an overview of what you can expect to find within its pages⁚
- This section covers the basics, including unpacking the camera, identifying its various parts and controls, and inserting the battery and memory card․ It provides a quick start guide to get you up and running with your D200․
Basic Shooting Mode⁚
- Learn how to take your first photos using the automatic shooting modes․ This section explains how to frame your shots, focus, and capture images in various common scenarios without needing to adjust complex settings․
Understanding Camera Settings⁚
- A detailed explanation of the camera’s menu system, covering options such as image quality, image size, white balance, ISO sensitivity, and more․ This section teaches you how to customize the camera’s settings to suit your specific shooting needs․
Advanced Shooting Modes⁚
- Explore the semi-automatic and manual shooting modes, including Program (P), Aperture Priority (A), Shutter Priority (S), and Manual (M)․ Learn how to control aperture and shutter speed to achieve creative effects and optimal exposure in various lighting conditions․
Focus and Metering⁚
- Dive deeper into the camera’s autofocus system, including focus modes, focus areas, and focus lock techniques․ Understand different metering modes and how they affect exposure in different shooting situations․
Image Playback and Review⁚
- Learn how to review your captured images on the camera’s LCD screen, zoom in for detail, view histograms, and delete unwanted photos․ This section also covers basic image editing options available within the camera․
Custom Functions⁚
- Discover the camera’s custom functions, which allow you to personalize the camera’s behavior to match your shooting style․ Learn how to customize button assignments, adjust auto-focus settings, and more․
Troubleshooting⁚
- A helpful guide to diagnosing and resolving common issues that may arise while using the camera․ This section provides solutions to problems such as error messages, focusing difficulties, and image quality concerns․
Accessories and Optional Equipment⁚
- An overview of compatible accessories, such as lenses, flash units, remote controls, and battery grips․ This section provides information on expanding the camera’s capabilities with additional equipment․
Technical Specifications⁚
- Detailed technical specifications of the camera, including sensor size, resolution, ISO range, shutter speed range, and more․ This section provides the technical details for advanced users․
By familiarizing yourself with the contents of the Nikon D200 instruction manual, you’ll be well-equipped to take full advantage of your camera’s capabilities and capture stunning images in a wide range of photographic situations․
Camera Kit Components
The Nikon D200 camera kit typically includes a set of essential components that allow you to start shooting right out of the box․ While specific contents may vary slightly depending on the retailer or promotional bundle, here’s a general overview of what you can expect to find in a standard Nikon D200 camera kit⁚

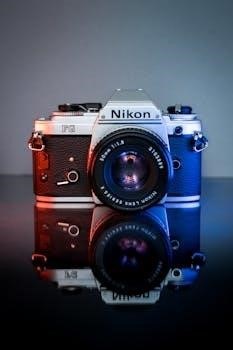
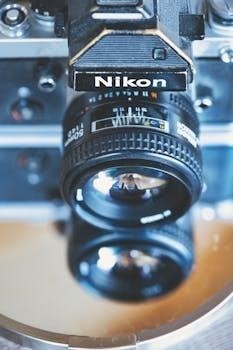
Nikon D200 Camera Body⁚
- The core of the kit, the D200 camera body houses the image sensor, processor, and other essential components․ It features a durable construction, ergonomic design, and a range of advanced features for capturing high-quality images․
Rechargeable Li-ion Battery EN-EL3e⁚
- A dedicated rechargeable lithium-ion battery that powers the camera․ The EN-EL3e provides ample power for extended shooting sessions․
Battery Charger MH-18a⁚
- A battery charger specifically designed for the EN-EL3e battery․ It allows you to recharge the battery quickly and efficiently, ensuring that you’re always ready to shoot․
Video Cable⁚
- A video cable that allows you to connect the camera to a television or monitor for viewing your photos and videos on a larger screen․
USB Cable⁚
- A USB cable for connecting the camera to a computer․ This allows you to transfer images and videos from the camera to your computer for editing, storage, and sharing․
Camera Strap⁚
- A comfortable and adjustable camera strap that allows you to carry the camera securely around your neck or shoulder․
Body Cap⁚
- A protective cap that covers the camera’s lens mount when a lens is not attached․ This prevents dust and debris from entering the camera body․
Eyepiece Cap DK-5⁚
- A small cap that covers the viewfinder eyepiece to prevent stray light from entering and affecting exposure readings․
LCD Monitor Cover BM-6⁚
- A protective cover for the camera’s LCD monitor, preventing scratches and damage․
Software Suite CD-ROM⁚
- A CD-ROM containing Nikon’s software suite, which may include software for image editing, file management, and camera control․
1User Manual⁚
- A printed user manual that provides detailed instructions on how to use the camera and its features․ This is the document that this whole conversation revolves around!
Please note that this is a general list, and the actual contents of your Nikon D200 camera kit may vary․ Always check the packaging and included documentation to confirm the specific components included in your kit․
Notices and FCC Compliance
The Nikon D200, like all electronic devices, is subject to certain notices and compliance regulations, particularly concerning radio frequency interference․ These notices are crucial for users in the United States and other regions to ensure safe and compliant operation․ Here’s a breakdown of what you can typically expect in the “Notices and FCC Compliance” section of the D200’s instruction manual⁚
Federal Communications Commission (FCC) Radio Frequency Interference Statement⁚
- This statement informs users that the D200 has been tested and found to comply with the limits for a Class B digital device, pursuant to Part 15 of the FCC Rules․ These limits are designed to provide reasonable protection against harmful interference in a residential installation․
- The statement also clarifies that the equipment generates, uses, and can radiate radio frequency energy and, if not installed and used in accordance with the instructions, may cause harmful interference to radio communications․
- Furthermore, the statement advises users that there is no guarantee that interference will not occur in a particular installation and suggests measures to correct interference, such as reorienting or relocating the receiving antenna, increasing the separation between the equipment and receiver, connecting the equipment into an outlet on a circuit different from that to which the receiver is connected, and consulting the dealer or an experienced radio/TV technician for help․
Modifications⁚
- This section typically warns users that changes or modifications to the D200 not expressly approved by Nikon could void the user’s authority to operate the equipment․
Notices Regarding Copyrights and Intellectual Property⁚
- The manual usually includes notices regarding copyrights and intellectual property rights associated with the camera’s software, firmware, and documentation․ It emphasizes that the user is granted a limited license to use the software and documentation for personal use only and that unauthorized copying, distribution, or modification is prohibited․
General Safety Precautions⁚
- This section highlights important safety precautions to prevent electric shock, fire, or other hazards․ It advises users to read and understand all instructions before operating the camera, to avoid exposing the camera to extreme temperatures or humidity, and to disconnect the power cord during cleaning or maintenance․
Compliance Information for Other Regions⁚
- Depending on the region where the D200 is sold, the manual may include compliance information for other regulatory bodies, such as the European Union’s CE marking or similar certifications for other countries․
- A general disclaimer stating that Nikon is not liable for any damages or losses resulting from the use of the D200 or its documentation․ It may also state that the information in the manual is subject to change without notice․
It’s essential to carefully read and understand these notices and compliance regulations to ensure the safe and proper operation of your Nikon D200 and to avoid any potential legal issues․
Basic Operation Guide
The Nikon D200, a powerful and versatile DSLR, can seem daunting at first․ This basic operation guide will walk you through the essential steps to get you started taking great photos․ Familiarizing yourself with these fundamentals will unlock the camera’s potential and allow you to capture stunning images․
Battery and Memory Card Insertion⁚
- Battery⁚ Locate the battery compartment, usually at the bottom of the camera․ Open the compartment door and insert the dedicated Nikon battery, ensuring it’s oriented correctly․ Close the door until it clicks securely․
- Memory Card⁚ Find the memory card slot, typically on the side of the camera․ Open the cover and insert a compatible CompactFlash (CF) card․ Ensure the card is oriented correctly before gently pushing it in until it clicks into place․ Close the cover․
Powering On and Off⁚
- The power switch is usually located around the shutter release button on the top right of the camera․ Slide the switch to the “ON” position to power on the camera․ To turn it off, slide the switch back to the “OFF” position․

Setting the Shooting Mode⁚
- The mode dial, typically located on the top left of the camera, allows you to select different shooting modes․ Common modes include⁚
- Auto⁚ The camera automatically selects the optimal settings for various shooting conditions․
- Program (P)⁚ The camera sets the aperture and shutter speed, but you can adjust other settings like ISO and white balance․
- Aperture-Priority (A or Av)⁚ You set the aperture, and the camera automatically selects the corresponding shutter speed․ This mode is ideal for controlling depth of field․
- Shutter-Priority (S or Tv)⁚ You set the shutter speed, and the camera automatically selects the corresponding aperture․ This mode is useful for capturing motion․
- Manual (M)⁚ You have full control over both the aperture and shutter speed․
Focusing⁚
- Autofocus (AF)⁚ The D200 offers various autofocus modes․ Half-press the shutter release button to activate autofocus․ The camera will attempt to focus on the subject․ Once focused, the focus point will usually illuminate in green․
- Manual Focus (MF)⁚ Switch the lens to manual focus mode (usually a switch on the lens itself)․ Rotate the focus ring on the lens until the subject appears sharp in the viewfinder or on the LCD screen (if using Live View)․
Taking a Photo⁚
- Compose your shot by looking through the viewfinder or using the LCD screen (if available)․
- Half-press the shutter release button to focus․
- Once focused, fully press the shutter release button to take the photo․
Reviewing Images⁚
- Press the playback button (usually a triangle symbol) to view the photos you’ve taken․
- Use the multi-selector (directional pad) to scroll through the images․
- Press the zoom button to magnify an image for closer inspection․
Understanding the Display⁚
- The LCD screen displays important information such as⁚
- Shutter speed
- Aperture
- ISO
- Battery level
- Number of shots remaining
- Shooting mode
These basic steps will help you get started with your Nikon D200․ As you become more comfortable, explore the camera’s advanced features to further enhance your photography skills․
Troubleshooting
Menu Navigation
Navigating the Nikon D200’s menu system is crucial for accessing and customizing various camera settings․ The menu is organized into logical sections, allowing you to fine-tune the camera’s performance to your specific needs and preferences․ Understanding the menu structure will significantly improve your workflow and enable you to take full advantage of the D200’s capabilities․
Accessing the Menu⁚
- Press the “MENU” button located on the back of the camera․ This will bring up the main menu screen on the LCD monitor․
Navigating the Menu Options⁚
- Use the multi-selector (the directional pad) to navigate through the menu options․ The up and down arrows move between different menu items within a section, while the left and right arrows move between different menu sections․
Selecting a Menu Item⁚
- Once you have highlighted the desired menu item, press the “OK” button to select it and access its settings․
Menu Sections Overview⁚
- The Nikon D200 menu is typically divided into the following sections⁚
- Playback Menu⁚ This menu allows you to review, delete, protect, and rotate images, as well as adjust playback settings such as slideshows and display options․
- Shooting Menu⁚ This is where you’ll find settings related to image quality, image size, white balance, ISO sensitivity, autofocus mode, metering mode, and other shooting parameters․
- Custom Setting Menu⁚ This menu provides a wide range of customizable options to tailor the camera’s behavior to your specific shooting style․ You can adjust settings related to autofocus, exposure, metering, display, and more․
- Setup Menu⁚ This menu contains settings related to the camera’s overall operation, such as language, date and time, video mode, LCD brightness, and firmware version․
- Retouch Menu⁚ This menu offers basic in-camera image editing tools, such as red-eye correction, trimming, monochrome conversion, and filter effects․
Understanding Menu Icons⁚
- Each menu section is typically represented by a distinct icon, making it easier to navigate to the desired section․ Refer to the camera’s manual for a detailed explanation of each icon․
Exiting the Menu⁚
- To exit the menu and return to the shooting screen, press the “MENU” button again․
Tips for Efficient Menu Navigation⁚
- Familiarize yourself with the menu structure⁚ Take some time to explore the different menu sections and their contents․ This will help you quickly locate the settings you need․
- Use the “Recent Settings” option⁚ Some Nikon cameras offer a “Recent Settings” option that displays the menu items you have recently accessed․ This can save you time when frequently adjusting the same settings․
- Refer to the camera’s manual⁚ The manual provides a comprehensive explanation of all menu options and their functions․
By mastering the Nikon D200’s menu navigation, you’ll be able to efficiently customize the camera’s settings and unlock its full potential for capturing stunning images․
Be First to Comment