Welcome to the comprehensive guide for your Lil Sew and Sew sewing machine! This manual provides essential information for operating and maintaining your machine․ From setup to troubleshooting, we’ll cover everything you need to get started and enjoy your sewing journey․
Overview of the Lil Sew and Sew Sewing Machine
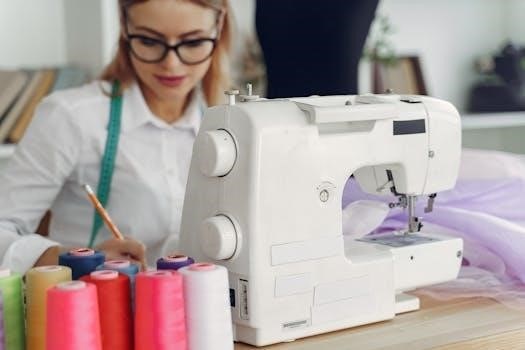
The Lil Sew and Sew sewing machine is a compact and user-friendly option designed for beginners and those seeking a portable solution for basic sewing tasks․ Often recognized for its white color and lightweight build, this machine is ideal for small projects, quick repairs, and crafting endeavors․ Its simplicity makes it an excellent choice for individuals of all ages and skill levels who are learning to sew․
This mini sewing machine typically features straightforward controls and easy-to-understand operation, allowing users to quickly grasp the fundamentals of sewing․ Whether you’re hemming pants, creating simple crafts, or mending tears, the Lil Sew and Sew provides a convenient and efficient way to handle minor sewing needs․ Its portability makes it perfect for taking to classes, workshops, or for use in small living spaces․ With its affordable price point and accessible features, the Lil Sew and Sew sewing machine offers a practical introduction to the world of sewing․ Several models are available, be sure to find the correct manual for your version․
Key Features and Benefits
The Lil Sew and Sew sewing machine offers several key features that make it a popular choice for beginners and those seeking a basic sewing solution․ Its compact and lightweight design ensures portability, making it easy to transport and store․ The machine’s ease of use is a significant benefit, with simple controls and straightforward threading, allowing users to quickly get started on their projects․
Another notable feature is its versatility in handling minor sewing tasks, such as hemming, mending, and crafting․ The Lil Sew and Sew is also known for its affordable price point, making it accessible to a wide range of users․ Additionally, many models offer dual-speed settings, providing more control over the sewing process․ The inclusion of features like a built-in light and thread cutter enhances convenience and efficiency․ Overall, the Lil Sew and Sew sewing machine combines simplicity, portability, and affordability, making it an excellent entry-level option for anyone interested in learning to sew or needing a basic sewing tool․
Setting Up the Machine⁚ A Step-by-Step Guide
Setting up your Lil Sew and Sew sewing machine is a straightforward process․ First, ensure you have a stable and flat surface to place the machine on․ Next, connect the power adapter to the machine and plug it into a power outlet, or insert batteries if your model is battery-operated․ Locate the power switch, usually on the side or back of the machine, and turn it on․
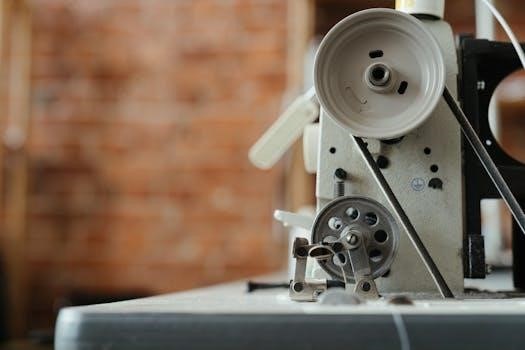
Now, let’s prepare the machine for sewing․ Install the thread spindle by inserting it into the designated slot on the top of the machine․ Place a spool of thread onto the spindle․ Next, you’ll need to install the needle․ Ensure the machine is turned off or unplugged for safety․ Loosen the needle clamp screw, insert the needle with the flat side facing the back, and tighten the screw securely․ Finally, familiarize yourself with the machine’s controls, such as the stitch selector, reverse button, and foot pedal․ With these steps completed, your Lil Sew and Sew machine is now set up and ready for threading․
Threading the Needle and Bobbin
Threading the needle and bobbin correctly is crucial for smooth sewing․ Start by raising the presser foot lever․ Locate the thread guide and thread the spool through it․ Next, follow the threading path indicated on the machine, usually marked with numbers or arrows․ Guide the thread down through the tension disc, then up and over the take-up lever․ Finally, thread the needle from front to back․
Now, let’s prepare the bobbin․ Open the bobbin case and insert the bobbin, ensuring the thread unwinds in the correct direction (refer to your machine’s diagram)․ Pull the bobbin thread through the slot in the bobbin case․ Hold the needle thread loosely and turn the handwheel towards you to catch the bobbin thread․ Pull both threads under the presser foot, leaving a few inches of thread extending behind the machine․ Close the bobbin case․ With the needle and bobbin threaded, your Lil Sew and Sew is ready to sew! Remember to always double-check the threading to avoid issues like thread breakage or skipped stitches․
Basic Sewing Techniques
Mastering basic sewing techniques is fundamental for any sewing project․ Let’s begin with starting and ending a seam․ Always begin by backstitching a few stitches to secure the seam, then continue sewing forward․ At the end of the seam, backstitch again to prevent unraveling․
Next, practice sewing straight lines․ Use the edge of the presser foot as a guide and maintain a consistent speed․ For curves, gently guide the fabric, pivoting with the needle down to create smooth turns․ When sewing different fabric types, adjust the stitch length and tension․ Thicker fabrics require longer stitches, while thinner fabrics need shorter stitches․ Test your settings on a scrap piece before sewing your project․ Pressing seams as you sew is essential for a professional finish․ Use an iron to flatten each seam, following the grain of the fabric․ With these basic techniques, you’ll be well on your way to creating beautiful sewing projects with your Lil Sew and Sew․
Troubleshooting Common Issues
Even with proper care, you might encounter issues with your Lil Sew and Sew․ One common problem is thread bunching under the fabric․ This usually indicates incorrect threading or tension problems․ Re-thread both the needle and bobbin, ensuring the thread is properly seated in all guides․ Adjust the tension dial, experimenting with slightly higher or lower settings until the bunching stops․
Another issue is the needle breaking․ This can occur if the needle is bent, or the fabric is too thick․ Replace the needle with a new one of the appropriate size for your fabric․ If the machine is skipping stitches, check that the needle is correctly inserted and not damaged․ Ensure you’re using the correct needle for the type of fabric you’re sewing․ If the fabric isn’t feeding properly, clean the feed dogs and check for lint or debris․ Always consult the user manual for specific troubleshooting steps related to your Lil Sew and Sew․
Maintenance and Care
Proper maintenance is crucial for extending the life of your Lil Sew and Sew sewing machine․ Regular cleaning prevents lint and dust buildup, which can hinder performance․ Always unplug the machine before cleaning․ Use a soft brush to remove lint from the bobbin area, feed dogs, and other accessible parts․ A small vacuum cleaner attachment can also be helpful․
Occasionally, oiling the machine is necessary to keep moving parts running smoothly․ Refer to your user manual for specific oiling instructions, as the location of oiling points may vary․ Use only sewing machine oil, as other oils can damage the machine․ Store the machine in a clean, dry place, away from direct sunlight and extreme temperatures․ Consider using a dust cover to protect it when not in use․ With consistent care, your Lil Sew and Sew will provide years of reliable service․ Remember to consult your user manual for detailed maintenance schedules and recommendations․

Safety Precautions
Your safety is paramount when using the Lil Sew and Sew sewing machine․ Always read the user manual thoroughly before operation․ Keep fingers away from the needle and moving parts during use․ Never operate the machine if the needle guard is damaged or missing․ Disconnect the power supply when changing the needle, cleaning the machine, or performing maintenance․
Ensure the power cord is in good condition and avoid using extension cords if possible․ If an extension cord is necessary, use one with the appropriate voltage and amperage rating․ Supervise children closely when they are using the machine, or keep it out of their reach․ Never operate the machine while tired or under the influence of drugs or alcohol․ Avoid sewing over pins, as this can damage the needle and pose a safety hazard․ If the machine malfunctions, stop using it immediately and consult a qualified technician․ Adhering to these safety precautions ensures a safe and enjoyable sewing experience․
Available Accessories and Attachments
Enhance your Lil Sew and Sew sewing machine with a variety of accessories and attachments designed to expand its capabilities․ Standard accessories often include extra needles of various sizes, suitable for different fabric types, bobbins for pre-winding thread, and a seam ripper for correcting errors․ Consider purchasing a zipper foot for easy zipper insertion, a buttonhole foot for creating uniform buttonholes, and a blind hem foot for achieving professional-looking hems․
Other useful attachments include a gathering foot for creating ruffles and gathers, a quilting guide for evenly spaced quilting lines, and a walking foot for feeding multiple layers of fabric evenly․ A needle threader can simplify the threading process, while a lint brush will keep your machine clean and running smoothly․ Explore these accessories to maximize the versatility of your Lil Sew and Sew and tackle a wider range of sewing projects with ease․ Check the manufacturer’s website or authorized retailers for compatible accessories․
Where to Find the User Manual and Support Resources
Accessing the user manual for your Lil Sew and Sew sewing machine is crucial for optimal use and maintenance․ The physical manual is typically included in the product packaging․ If misplaced, a digital version is often available on the manufacturer’s website, usually in PDF format for easy download․ Look for a “Support” or “Downloads” section on the site, searching by model number (e․g․, LSS-505)․
Beyond the manual, various support resources are available․ The manufacturer’s website may offer FAQs, troubleshooting guides, and instructional videos․ Online forums and sewing communities can provide peer support, tips, and solutions to common issues․ YouTube hosts numerous tutorials demonstrating machine setup, threading, and basic sewing techniques․ Consider contacting the manufacturer directly via email or phone for specific inquiries or warranty-related matters․ Local sewing machine repair shops may also offer assistance and servicing․
Be First to Comment