Lil Sew and Sew Instruction Manual⁚ A Comprehensive Guide
This manual provides a comprehensive guide to the Michley Lil Sew and Sew, perfect for beginners and small projects. It covers setup, basic techniques, and care.
Overview of the Lil Sew and Sew Machine
The Michley Lil Sew and Sew is a compact, lightweight sewing machine designed for basic sewing tasks and small projects. Its portability and ease of use make it an ideal choice for beginners, students, or anyone needing a quick and convenient sewing solution for simple repairs and crafts. This machine is often favored for its straightforward operation and user-friendly design, allowing even those with minimal sewing experience to achieve satisfactory results. The Lil Sew and Sew typically features a simple threading system, basic stitch options, and adjustable speed settings, providing essential functionality without overwhelming complexity. It’s important to note that while it excels at fundamental tasks, it may not be suitable for heavy-duty fabrics or intricate sewing projects requiring advanced features. Despite its limitations, the Lil Sew and Sew offers an affordable and accessible entry point into the world of sewing, empowering users to explore their creativity and tackle everyday sewing needs with ease. Furthermore, its compact size makes it easy to store and transport, adding to its versatility and appeal for various users.
Setting Up Your Lil Sew and Sew
Get ready to sew! This section guides you through setting up your Lil Sew and Sew, from identifying parts to preparing for your first stitch.
Identifying Parts and Accessories
Before you begin sewing, it’s crucial to familiarize yourself with the different parts and accessories of your Lil Sew and Sew machine. This section will walk you through identifying each component, ensuring you understand its function and how it contributes to the sewing process. Let’s start with the main body of the machine⁚ Locate the power switch, which controls the machine’s on/off function and speed. Next, identify the needle clamp, which securely holds the needle in place. The presser foot is another essential part; it applies pressure to the fabric, keeping it stable while sewing. Find the bobbin winder spindle, used for winding thread onto the bobbin. Now, let’s move on to the accessories. You should have several bobbins, small spools that hold the bottom thread; A needle threader can be extremely helpful for threading the needle, especially for beginners. A seam ripper is a handy tool for removing unwanted stitches. Finally, check for the foot pedal, which controls the sewing speed, and the power adapter, which connects the machine to a power source. Understanding these parts and accessories is the first step towards mastering your Lil Sew and Sew machine and embarking on successful sewing projects.
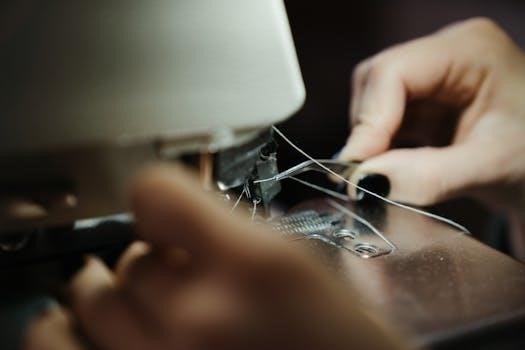
Threading the Machine⁚ A Step-by-Step Guide
Threading your Lil Sew and Sew machine correctly is essential for smooth and consistent stitching. Follow these steps carefully to ensure proper threading⁚ First, make sure the machine is turned off and the power switch is in the “OFF” position to prevent accidental operation. Raise the presser foot using the presser foot lever. This releases tension on the thread, making it easier to thread. Next, position the thread spool on the thread spool pin. Ensure the thread unwinds smoothly from the spool. Now, guide the thread through the thread guide, which is usually a small hook or eyelet located near the top of the machine. From the thread guide, bring the thread down and around the tension disc. This controls the thread tension, which is crucial for balanced stitches. Then, thread the take-up lever, a small metal arm that moves up and down as you sew. Make sure the thread is securely in the take-up lever’s eye. Finally, thread the needle from front to back. Use the needle threader if needed. Pull a few inches of thread through the needle’s eye. For the bobbin, insert a wound bobbin into the bobbin case. Guide the thread through the tension spring on the bobbin case. Close the bobbin case. Hold the needle thread loosely and turn the handwheel towards you. This will catch the bobbin thread and bring it up through the needle plate. Pull both threads (needle and bobbin threads) back and under the presser foot. You’re now ready to start sewing!
Basic Sewing Techniques
Learn fundamental sewing skills for your Lil Sew and Sew. Master operating the machine, sewing straight lines, and creating curves with confidence.
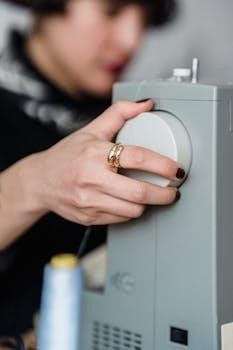
Operating the Machine⁚ Power and Speed Control
Understanding the power and speed controls of your Lil Sew and Sew is crucial for successful sewing. The machine features a simple on/off switch that also controls the sewing speed. Gently slide the switch to the “on” position to start the machine. A slower speed is ideal for beginners and intricate work, allowing for greater control and precision. To increase the sewing speed, slide the switch further. Remember to start slowly and gradually increase the speed as you become more comfortable with the machine. It’s essential to practice controlling the speed to maintain consistent stitch quality and avoid errors. Before starting any project, test the speed on a scrap piece of fabric to ensure you have the desired control. Consistent speed contributes to even stitching and a professional finish. Always turn the machine off when not in use and unplug it from the power source for safety. Familiarize yourself with the location of the power switch for quick access in case of emergencies. Mastering speed control allows you to tackle a wider range of sewing projects with confidence and achieve optimal results with your Lil Sew and Sew.
Sewing Straight Lines and Curves
Achieving straight lines and smooth curves is fundamental to sewing success with your Lil Sew and Sew. For sewing straight lines, use the edge of the presser foot as a guide, aligning it with the edge of your fabric. Maintain a consistent distance between the fabric edge and the presser foot as you sew. Look ahead towards the presser foot, not directly at the needle, to ensure a straight path. For beginners, it’s helpful to draw a line on the fabric as a guide. Practice sewing along this line to develop your control and accuracy. To sew curves, gently guide the fabric in the desired direction, maintaining a slow and steady speed. Avoid forcing the fabric, as this can cause uneven stitches or puckering. For tighter curves, lift the presser foot slightly and pivot the fabric before continuing to sew. This allows you to adjust the fabric’s position without breaking the stitch. Practice sewing on scrap fabric with various curves to improve your technique. Use a fabric marker to draw curves of different radii and practice following these lines. Remember that patience and practice are key to mastering both straight lines and curves. Consistent speed and gentle fabric guidance will result in professional-looking seams and finished projects with your Lil Sew and Sew.

Troubleshooting Common Issues
This section addresses common problems encountered while using the Lil Sew and Sew, offering solutions for smooth and efficient sewing projects.
Thread Bunching and Jamming
Thread bunching and jamming are frustrating issues that can occur with the Lil Sew and Sew. These problems often stem from incorrect threading, improper tension settings, or the use of unsuitable thread. To resolve thread bunching, first, ensure the machine is properly threaded, following the step-by-step guide in this manual. Pay close attention to the thread path and make sure the thread is correctly seated in the tension disc. If the thread continues to bunch, check the bobbin case for lint or debris, cleaning it thoroughly with a small brush. Adjusting the tension dial can also help; try slightly loosening the top thread tension if the bunching occurs on the underside of the fabric, or tightening it if the bunching is on the top. Jamming can be caused by a tangled bobbin thread or a build-up of fabric fibers in the machine’s mechanism. If the machine jams, turn it off immediately and carefully remove the fabric. Inspect the bobbin area and remove any tangled threads or obstructions. Oiling the machine, as described in the maintenance section, can also prevent jamming by ensuring smooth operation of the moving parts. Always use high-quality thread suitable for lightweight fabrics, as thicker threads can sometimes cause issues. Regularly cleaning and maintaining your Lil Sew and Sew will minimize the occurrence of thread bunching and jamming, ensuring a more enjoyable sewing experience. Refer to the included diagrams for visual guidance on threading and bobbin placement.
Needle Breakage
Needle breakage is a common issue encountered while using the Lil Sew and Sew, and it can be caused by several factors. One of the most frequent reasons is using the wrong type or size of needle for the fabric being sewn. Ensure you are using a needle appropriate for the weight and weave of your fabric; a universal needle is suitable for many common fabrics, but finer fabrics like silk or knit may require a specialized needle. Another cause of needle breakage is sewing too quickly or forcing the fabric through the machine. Always maintain a steady, controlled pace and allow the machine to feed the fabric naturally. Never pull or push the fabric, as this can bend or break the needle. A bent needle should be replaced immediately, as it is more prone to breaking and can damage the machine. Incorrect needle insertion is another potential culprit. Make sure the needle is fully inserted into the needle clamp with the flat side facing the correct direction, as indicated in the threading section of this manual. Check the needle clamp screw to ensure it is tightened securely, but not overtightened. Sewing over pins can also cause needle breakage. Remove pins as you sew, or sew slowly and carefully around them. Finally, ensure that the needle plate is clean and free of burrs or scratches, as these can snag the thread and cause the needle to break. Regularly inspect and maintain your needles to prevent breakage and ensure smooth, trouble-free sewing. If breakage persists, consult a qualified sewing machine technician.

Maintenance and Care
Proper maintenance ensures your Lil Sew and Sew operates smoothly and lasts longer. Regular cleaning and oiling are crucial for optimal performance.
Cleaning the Machine
Keeping your Lil Sew and Sew clean is essential for its longevity and performance. Before you begin, always ensure the machine is switched off and unplugged from the power source to prevent any accidental operation or electric shock. Dust and lint can accumulate inside the machine, interfering with its moving parts and causing issues like thread bunching or jamming.
To clean the exterior, use a soft, dry cloth to wipe down the surfaces. Avoid using harsh chemicals or abrasive cleaners, as these can damage the plastic casing and other components. For more stubborn dirt, you can slightly dampen the cloth, but be sure to dry the area immediately afterward.
The interior of the machine requires more attention. Remove the bobbin case and use a small brush, such as a paintbrush or a lint brush, to gently remove any lint, thread scraps, or dust bunnies that have accumulated. Pay particular attention to the feed dogs (the small teeth that move the fabric) and the area around the needle. Compressed air can also be used to blow out any remaining debris.
Regular cleaning, ideally after each use or after completing a project, will prevent buildup and ensure smooth operation. A clean machine is a happy machine, and a happy machine will produce better sewing results!
Oiling and Lubrication
Proper oiling and lubrication are crucial for maintaining the smooth operation and extending the lifespan of your Lil Sew and Sew sewing machine. Sewing machines have many moving parts that require lubrication to reduce friction and prevent wear and tear. Without proper oiling, these parts can become stiff, leading to poor stitch quality, increased noise, and eventually, machine failure.
Before oiling, always ensure the machine is turned off and unplugged. Use only sewing machine oil, as other types of oil may contain additives that can damage the machine. Apply a small drop of oil to each of the designated lubrication points, as indicated in the diagram or instructions that came with your machine. Common points include the bobbin case area, the needle bar, and any other visible moving parts.
After applying the oil, turn the handwheel several times to distribute the oil evenly. You can also run a scrap piece of fabric through the machine to absorb any excess oil. Be careful not to over-oil the machine, as this can attract more dust and lint.
How often you need to oil your machine depends on how frequently you use it. If you sew regularly, oiling once a month is a good practice; If you only use the machine occasionally, oiling every few months may be sufficient. Listen to your machine; if it starts to sound noisy or sluggish, it’s probably time to oil it. Regular oiling will keep your Lil Sew and Sew running smoothly and efficiently for years to come.
Be First to Comment